How to Cut and Measure Drywall
Knowing how to cut and measure drywall is an important skill for anyone working on walls and ceilings. Whether you're doing a repair or installing new drywall, getting the right measurement and cut makes your job easier and your finish smoother. If you cut drywall the wrong way, you can waste material or leave a rough gap at the seam.
To get started, always measure carefully with a tape. Mark your cut with a pencil, then score the drywall with a sharp utility knife. After you score the front, snap it along the line, and cut through the paper on the back. You can use a drywall saw or utility knife to shape around an electrical box, wire, or fixture. When you need to cut tight spots or curves, a rasp can help smooth the edges.
This guide will walk you through each step—from marking the drywall, choosing the right blade, using a saw, and placing screws into each stud. Whether you're patching a wall or cutting for a full install, these tips will help you cut drywall like a pro. Always check that your cuts are plumb, and your pieces are installed correctly for best results. For more info, see our privacy policy and terms of service.
Understanding Drywall
What is Drywall?
Drywall, also known as gypsum board or plasterboard, is a panel made of gypsum plaster pressed between two thick sheets of paper. It's commonly used in building interior walls and ceilings due to its affordability and ease of installation.
Types of Drywall
- Standard Drywall: The most common type, used for walls and ceilings in dry areas. It's easy to work with and cost-effective.
- Moisture-Resistant Drywall (Green Board): Ideal for areas with high humidity, like bathrooms and kitchens. It has a special coating to resist moisture but is not waterproof.
- Fire-Resistant Drywall (Type X): Contains special fibers to slow down the spread of flames, making it suitable for garages and areas requiring extra fire protection.
- Soundproof Drywall: Designed to reduce noise transmission, it's often used in bedrooms or home theaters.
- Mold-Resistant Drywall: Treated to resist mold growth, making it a good choice for basements or damp environments.
Choosing the Right Drywall
Selecting the right type of drywall depends on the specific needs of your project. Consider the location, potential exposure to moisture, and any fire or soundproofing requirements. Making the right choice will help ensure the longevity and performance of your walls and ceilings. For more detailed guidance on choosing the right type of drywall, check out
Choosing the Right Type of Drywall: A Comprehensive Guide.
Tools Required for Cutting and Measuring Drywall
Essential Tools
Having the right tools is crucial for cutting and measuring drywall accurately. Here are the essential tools you'll need:
- Utility Knife: A sharp utility knife is your primary tool for scoring and cutting drywall. It's versatile and easy to handle.
- Drywall Saw: This is used for making small cuts or when a straight edge isn't possible, such as cutting out holes for outlets or fixtures.
- T-Square or Drywall Square: Essential for making straight lines and accurate measurements. It helps ensure precise cuts and reduces errors.
- Tape Measure: A good tape measure is crucial for measuring lengths and marking cut lines on the drywall sheets.
- Straight Edge: Use a straight edge to guide your utility knife for accurate, straight cuts.
Additional Tools
While not essential, these tools can make your drywall project easier and more efficient:
- Rotary Tool: Ideal for cutting out intricate shapes or curves in drywall. It's especially useful for electrical outlets and switch boxes.
- Oscillating Multi-Tool: This tool is versatile and can be used for precise cuts in tight spaces.
- Drywall Lifter: Helps position drywall sheets, especially when working alone or handling large pieces.
Safety Gear
Safety should always be a priority when working with drywall. Here’s what you’ll need:
- Safety Glasses: Protect your eyes from dust and debris.
- Dust Mask: Prevents inhalation of drywall dust, which can be harmful over time.
- Gloves: Protects your hands from cuts and scrapes while handling drywall sheets.
Having these tools and safety gear will help you efficiently cut and measure drywall while ensuring safety and accuracy in your work.
Measuring Drywall
Step-by-Step Instructions
Accurate measurement is key to a successful drywall installation. Here’s how to measure drywall for your project:
1. Assess the Area: Before measuring, take a good look at the space where you’ll be installing the drywall. Note any windows, doors, or obstructions.
2. Measure Wall Height and Width:
- Use your tape measure to find the height and width of the wall or ceiling. Record these measurements carefully.
- If you're working with irregularly shaped areas, break them down into smaller sections and measure each part separately.
3. Mark the Drywall Sheet:
- Transfer your measurements onto the drywall sheet. Use a pencil to make clear marks.
- Double-check your measurements before marking to ensure accuracy.
4. Use a T-Square for Straight Lines:
- Place a T-square or drywall square along your pencil marks to draw straight lines. This will guide your cuts and help ensure a snug fit.
Tips for Measuring Around Obstructions
- Windows and Doors:
- Measure from the edges of the drywall sheet to the opening. Mark the dimensions carefully.
- Allow for any necessary clearance around frames and edges.
- Electrical Outlets and Fixtures:
- Measure the distance from the edge of the drywall to the center of the outlet or fixture.
- Use a rotary tool to cut out precise openings.
Common Mistakes to Avoid
- Rushing the Process: Take your time to measure and double-check your work. Hasty measurements can lead to costly errors.
- Incorrect Measurements: Always measure twice to confirm accuracy before cutting.
- Ignoring Wall Irregularities: Consider any bulges or uneven areas in the wall when measuring and cutting drywall.
By following these steps, you’ll ensure that your drywall fits perfectly, reducing waste and the need for adjustments.
Cutting Drywall
Step-by-Step Guide
Cutting drywall accurately is crucial for a smooth installation. Follow these steps to ensure clean and precise cuts:
1. Prepare Your Workspace:
- Clear the area of any obstacles and lay the drywall sheet on a flat surface. A pair of sawhorses or a large table works well.
- Ensure good lighting to see your marks and cuts clearly.
2. Score the Drywall:
- Use a sharp utility knife to score along the pencil line you marked earlier. Press firmly but don’t cut all the way through the board.
- Use a straight edge or T-square as a guide to keep your line straight.
3. Snap the Drywall:
- After scoring, apply gentle pressure on either side of the cut to snap the drywall along the score line. It should break cleanly along the line.
- Once snapped, cut through the paper backing with your utility knife to separate the two pieces.
4. Smooth the Edges:
- Use a drywall rasp or sandpaper to smooth any rough edges. This will help the panels fit together more seamlessly during installation.
Techniques for Different Cuts
- Straight Cuts: Use the scoring and snapping method as described above. It’s the most common technique for cutting drywall.
- Curved Cuts:
- For curved cuts, use a drywall saw or rotary tool. Carefully follow the marked line, taking your time to ensure accuracy.
- Cutting for Outlets and Fixtures:
- Mark the outline of the outlet or fixture on the drywall. Use a rotary tool or drywall saw to cut out the opening.
Safety Tips
- Handle Tools Carefully: Keep your hands clear of the blade while cutting. Always cut away from your body.
- Maintain a Clean Workspace: Keep the area free of debris to prevent accidents and ensure smooth operation.
By following these steps, you'll achieve clean and precise cuts, making the installation process smoother and more efficient.
Fitting and Installing Drywall
Fitting Drywall
Properly fitting drywall panels is crucial for a smooth installation. Here's how to fit drywall correctly:
1. Position the Panels:
- Start by positioning the first panel at the top corner of the wall. Use a drywall lift or have a partner assist you if necessary.
- Ensure the edges are aligned with the studs for support.
2. Check the Fit:
- Ensure the panel fits snugly against the wall, with no gaps or misalignments.
- If the fit is too tight, use a rasp or sandpaper to trim the edges slightly.
3. Adjust for Openings:
- Make sure the cutouts for windows, doors, and outlets align correctly with the drywall sheet.
- Adjust the panel if needed to accommodate these openings without forcing the fit.
Installing Drywall
Once the drywall is properly fitted, follow these steps for installation:
1. Secure the Drywall:
- Use drywall screws to secure the panel to the studs. Start at the top and work your way down.
- Space the screws about 12 inches apart along the edges and 16 inches apart in the field (center) of the panel.
- Ensure the screws are slightly recessed without breaking the paper surface.
2. Stagger the Joints:
- When installing additional panels, stagger the joints to reduce the risk of cracks.
- This means the joints of adjacent panels should not align vertically.
3. Install Remaining Panels:
- Continue fitting and securing the remaining panels, working your way across the wall or ceiling.
- Make sure all edges are aligned and panels fit snugly together.
Tips for a Secure Installation
- Use the Right Tools: Ensure you have the appropriate screw gun or drill bit for drywall screws.
- Mind the Seams: Leave a small gap (about 1/8 inch) between panels to allow for expansion and contraction.
- Double-Check Alignment: Regularly check that the panels are level and aligned with the studs.
Proper fitting and installation ensure that the drywall will remain secure and look seamless once finished.
Common Challenges and Solutions
Working with drywall can present various challenges. Here are some common issues you might encounter and how to address them:
Gaps Between Panels
Challenge: Gaps between drywall panels can lead to weak joints and visible seams.
Solution:
- Check Measurements: Ensure your measurements are accurate before cutting. Double-check the fit of each panel before securing it.
- Use Joint Compound: Apply joint compound to fill small gaps. This helps create a smooth, seamless surface.
Uneven Cuts
Challenge: Uneven cuts can lead to poor fitting and unsightly seams.
Solution:
- Use Proper Tools: Make sure your utility knife is sharp and use a straight edge or T-square to guide your cuts.
- Trim Edges: Use a drywall rasp or sandpaper to smooth rough edges and achieve a clean finish.
Misaligned Panels
Challenge: Misaligned panels can cause problems during installation and lead to an uneven finish.
Solution:
- Align with Studs: Ensure each panel is properly aligned with the studs before securing. Adjust the panel as needed to achieve the correct position.
- Stagger Joints: Stagger the joints between panels to distribute stress and reduce the risk of cracks.
Bulges and Bumps
Challenge: Bulges or bumps in the drywall can occur if panels are not secured correctly or if there is an underlying issue with the framing.
Solution:
- Check the Framing: Inspect the framing for any protruding nails or screws that could cause bumps. Adjust as necessary.
- Secure Properly: Ensure each panel is securely fastened to the studs with the appropriate number of screws.
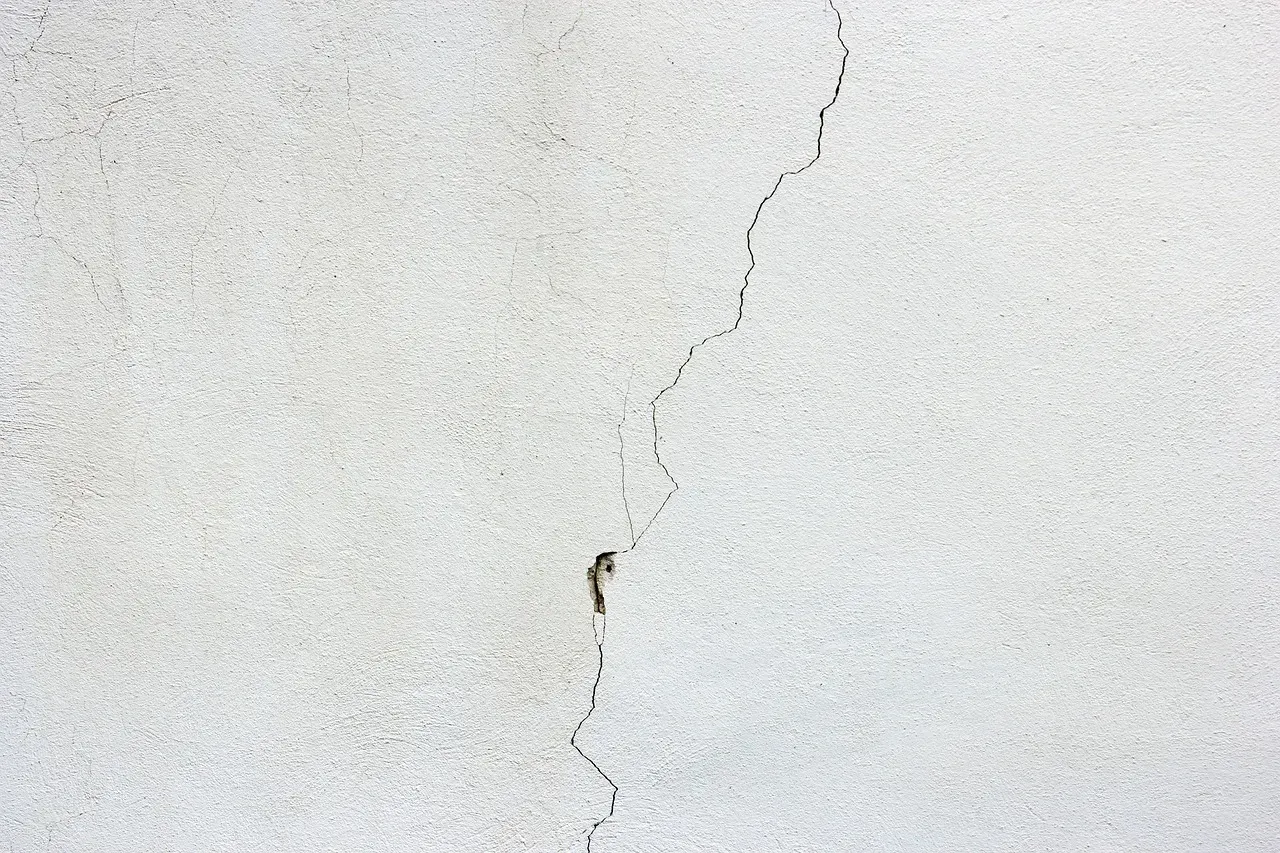
Cracks in Drywall
Challenge: Cracks can form due to movement in the building structure or improper installation.
Solution:
- Use Joint Tape: Apply joint tape over seams and joints to reinforce them and prevent cracks.
- Apply Joint Compound: Use joint compound to fill and smooth cracks. Sand the area after drying for a seamless finish.
By understanding these common challenges and applying the appropriate solutions, you can achieve a professional finish and ensure your drywall installation is successful.
Tips for a Professional Finish
Achieving a professional-looking finish with drywall requires attention to detail and proper techniques. Here are some tips to help you get the best results:
Taping and Mudding
1. Apply Joint Tape:
- Use paper or mesh joint tape to cover seams between panels. Start with vertical seams, then move to horizontal ones.
- Press the tape firmly into place, ensuring it lies flat without bubbles or wrinkles.
2. Apply Joint Compound:
- Use a drywall knife to apply a thin layer of joint compound over the tape. Start with a 6-inch knife for the first coat.
- Feather the edges to blend with the surrounding drywall. Let it dry completely before applying additional coats.
3. Second and Third Coats:
- Apply a second coat of joint compound using a wider knife (10 to 12 inches). Feather the edges further out from the seam.
- Allow the compound to dry, then apply a third coat if necessary, using a 12-inch knife for final smoothing.
Sanding
1. Sand the Surface:
- Use a sanding sponge or sandpaper (medium grit) to smooth the dried joint compound.
- Focus on feathering the edges to create a seamless transition between the compound and the drywall.
- For more detailed guidance, check out our blog on Sanding Joint Compound and Finishing Techniques.
2. Check for Imperfections:
- Shine a light along the wall to spot any uneven areas or remaining ridges. Sand these areas until smooth.
Priming and Painting
1. Prime the Drywall:
- Apply a coat of primer to the entire drywall surface. This helps the paint adhere better and ensures even coverage.
2. Paint the Surface:
- Use high-quality paint to finish the wall. Apply at least two coats for the best results, allowing each coat to dry completely before applying the next.
Additional Tips
- Work in Thin Layers: Apply thin coats of joint compound to avoid cracking and make sanding easier.
- Maintain Consistent Pressure: Use consistent pressure when applying tape and compound to avoid uneven application.
- Keep Tools Clean: Regularly clean your tools to prevent dried compound from affecting your finish.
By following these tips, you'll be able to achieve a smooth, professional finish on your drywall, enhancing the overall appearance of your walls and ceilings.
Conclusion
Cutting and measuring drywall accurately is essential for any successful construction or remodeling project. Whether you're a DIY enthusiast or a professional contractor, following the right techniques ensures that your drywall installation looks professional and lasts for years. By understanding the types of drywall, using the correct tools, and applying effective cutting and fitting techniques, you can avoid common pitfalls and achieve a flawless finish.
For those seeking professional assistance,
Frenchie Drywall is the premier drywall contractor serving Easthampton, Springfield, Chicopee, and the surrounding areas, including Montgomery, Northampton, South Hadley, Southampton, and Westhampton. With years of experience, we specialize in both residential drywall and commercial drywall services, as well as drywall installation and interior painting. Our team is dedicated to delivering top-quality craftsmanship and exceptional customer service.
Ready to transform your space with expertly installed drywall and a stunning finish?
Contact Frenchie Drywall today for all your drywall and painting needs. Whether you're working on a home renovation in Easthampton or a commercial project in Chicopee, we have the skills and experience to make your vision a reality. Visit our website or call us now to schedule a consultation and experience the difference of working with the best in the business.